Beautiful Card Designs Made Easy

September 14, 2015

Creating A Background ...

Hi Everybody,

When I used this background I had several emails asking me to show you how I did it.

So this has been the subject of another video tutorial that we did last week.

This uses Distress Inks and is very easy to do.

The card on the right is very bright, but in the video I did one in more autumnal colours and it would be ideal for any cards that you make for the men in your life.

I listed all the inks I used and showed you in which combination for the different looks in the tutorial Distress Ink Background

I dressed my card up with flowers from Wild Orchid Crafts  but this tortoiseshell look would be suitable for anybody.

The die I have used is #2 from Fleur de Elegance  and I cut it in an antique gold card

I found the gold sequins in a box that was lurking in a cupboard  when I was clearing out my craft room a few weeks ago ... and I knew they would come in handy !!

More tomorrow ...

Hugs xx

September 13, 2015

Another Video ...

Hi Everybody,

This video tutorial was added to YouTube last week and takes you through the steps I made to create the   Scalloped Pop Up Box.

It is one of several that have been added to the website in the last few days and I do hope that you will enjoy it

This is a die from Spellbinders and it is a useful addition to your crafty stash.

But I do appreciate  that not everybody can get these dies and so I am going to do another tutorial to make the box without using a die.

I will post the link on this blog once it is done

It takes a little while to get all the elements cut but once they are it is the fun part of putting it al ,,together.

So make a cuppa and then click the link Spellbinders Pop Up Box   to go to the page for this pretty little box

More tomorrow ...

Hugs xx


September 12, 2015

And the winner is ...

Hi Everybody,

Hope you are all well on this wet Saturday morning. I am going to make the most of today and maybe play a little more with some water colors.

 I will be sure to show you what I come up with .... Aaaaaand  I have some more video tutorials to complete and add to my website  Card Making Magic

The winner of the weaved card has been chosen and it will be on its way to you ....

Dorothy Flear ...
please email me your postal address to
christina@card-making-magic.com
and the card will be on its way to you straight away

More tomorrow ...

Hugs xx

September 11, 2015

Friday Freebie - 084

Hi Everybody,

Today card is created from the  Weaving Dies  by Sue Wilson.

To get this look you will need to buy both sets of dies so that you can weave the two together

They are easy sets to use and  can give you some lovely effects.

Here I have teamed it with the Grand Large Labels that sadly is now retired from the Spellbinders Website.

You may still be able to get if from other suppliers so it's worth looking for as it makes lovely shaped base cards ... it remains one of my favorites still

The flowers I have used are fromWild Orchid Crafts  and are a pretty display of Tulips, Magnolia,  Roses, Cherry Blossom and Gypsophilia

Now if you would like to own this card then all you have to do is leave me a comment at the bottom of the page and join the group of followers.

Then a name will be drawn from the comments and you will be notified in tomorrows blog post.

Please come back to check if it is you as you will only have 48 hours in which to claim the card.

And I know I have said it before ... and I really don't want it to sound like a moan, but if you are not available to claim the prize then do not add your name.

It is not fair on others who would really love to win what I have on offer.

The reason I mention this again is because one of the Bank Holiday Prizes was not claimed,  and it was such a good bundle to win, and also one of the 12 character cards from a previous FF was also not claimed.

The Bank Hol package will be offered again later on and somebody will get another chance to win a super prize.

More tomorrow ...

Hugs xx

September 10, 2015

Brusho Crystal Colours

Hi Everybody,

So today is Griffs' Birthday and tonight we are going out to our favorite restaurant.

Over the last few days I have kept him busy and we have been adding new videos to the website

Altogether there have been several completed tutorials and I will add them over the next few days.

This  one was to show you how I used the Brusho Crystal Colours that I bought at the craft show the other week.

These are so much fun to play with and no two cards will ever look the same.  I did the two blue roses  above with the same colours, stamps and sentiment but they do not look the same.

And yesterday the ladies in my card class also got to play with them too. 

This is their first attempt and both seemed to enjoy the process. These two cards are what they produced.

The Brusho colours are very vibrant and need to be used sparingly. But I know you will love them if you do get some to play with


More tomorrow ...

Hugs xx

September 09, 2015

Spellbinders Arched Window

Hi Everybody,

Earlier this week I was asked the question ... "What is the long thin bar for that is in the
Arched Window   die set?"

Here is a card that I made using that die set quite some time ago and I have added some Fancy Lattice  behind the frame to make the card look more churchy

The thin bar that is with the set is there for you to divide the window up into window panes if you wish.

By placing the strip in different places you can create a window that will give a new look each time you use it.

The dies  will produce solid panels or by nesting them together you can create frames of different  sizes

A really pretty die that can create some lovely effects for you and can be for many occasions.

This one is for a wedding but it would make a lovely Christmas card with a stained glass window in the frame

The bows centre and the Guipure lace in a soft cream are both from Wild Orchid Crafts and the sparkly Pearl and Diamanté strip is from Want2Scrap

More tomorrow ...

Hugs xx


September 08, 2015

Tuesday Tutorial - Floral Gazebo

Hi Everybody,

Todays tutorial is using the beautiful Floral Gazebo from Spellbinders and this can make the loveliest of wedding cards for you so easily.
Here I have dressed it up with flowers, ribbons and pearls and I am very happy with the result.
Spellbinders Supplies:

Other Supplies:

Instructions:

For the base I have folded an A4 piece of cream card in half along the short side and simply cut it in half. This will  give me two cards with the fold at the top to work on.  Save the other piece for another project.

I have matted and layered it with some vintage paper and cut a smaller layer 8x11 cms and layered that with the same paper
With the Gazebo I have cut two pieces ... one in card and the other in Craft Foam and glued the two pieces together.  This will make the die cut thicker as it is added to your card
Off setting the smaller panel I have added it to my card and wrapped the layers with ribbon before adding them to the base. Trim the panels as needed.
Have a practise run with where to add the bow, flowers and leaves and when you are happy with the arrangement  glue them in place.  Add in the appropriate sentiment using foam pads to raise it up.

Designers Tip:

Vary the color scheme to suit the wedding and the sentiment to suit the occasion. The die is pretty enough to blend with anything and this is the only die used on this card

More tomorrow ...

Hugs xx


September 07, 2015

Bank Holiday Winners ...

Hi Everybody,

The draw for the "Bank Holiday Goodies" has been done at random by InLinkz and the list is now closed. So if you didn't  add your name to the list then you are too late.  The emails have gone out to the two winners and you will each receive some crafting items for you to play with.

The winners are ....
Victoria Daniel (USA)
Christine Hubbard
please let me have your address so that the parcels can be posted off to you straight away.

I hope you will like the items and please let me know when it arrives with you.

More tomorrow ...

Hugs xx

Brusho Crystals

Hi Everybody,

You may rememberer me showing you some Brusho Crystals that I bought at the craft show last weekend ... well here is a card that I have made using them

They are very vibrant colors and a little goes a long way so use them very sparingly.

For this card I stamped and embossed in gold the Sketchy Rose from Altenew  onto some watercolor card

Then with a wet paintbrush and some clean water I have dampened the flower staying within the lines

Then with the red, orange and yellow crystals I have sprinkled on tiny amounts.  I evened out the color with my brush and allowed it to dry.

Once dry I have cut it out with scissors staying close to the embossed edge.  I did the leaves in the same way using the green from the pack

For the background I have sprinkled a very tiny amount of crystals and then spritzed it with clean water.  Trimmed it to size and layered it onto black card.  The sentiment is stamped onto the dry background and then all the layers added to my base

The flower has been added with foam pads underneath to give it height and the enamel dots have been randomly added for an extra effect.

I will be playing with these Brusho Crystals some more and I will make a video to show you what I do.

More tomorrow ...

Hugs xx

September 06, 2015

Pink and Yellow ...

Hi Everybody,

I know that this color scheme is not to everybodys  taste but I really like the look of this one.

It was just me playing around with some water colors again and for this one I have used Distress Inks. The colors I have used are Picked Raspberry and Mustard Seed

This method of adding the color to the card is one I have shared on Create and Craft and each time you try it the look will be different.

I have added in some pink and yellow flowers from Wild Orchid Crafts

The little sentiment is one I had in my "Stash" and I have no idea where it is from

Around the card I have dotted some pink and yellow sequins just to add that little extra.

The sentiment is added to Standard Circles Lg  and then layered onto pink spotty card

I have then added them with foam pads to Lacey Circles to the lower front of my card.

More tomorrow ...

Hugs xx


September 05, 2015

Card Winner ...

HI Everybody,

Today I was up bright and early and it is a lovely day. A little on the cool side but I quite like that.  Yesterday I went to play with Isabella and she gets funnier every time I see her.

For new readers of my blog Isabella is my great grand daughter and she is three ... and a budding comedian. Over the last few months we have said to her when she ignores us ... "Are you cocking me a deaf ear Isabella"  and it turns out that she has what is commonly called Glue Ear and it is affecting her hearing.

She cannot pick up sound clearly and on Thursday she had an operation to put Grommets into both ears. I didn't know what the op was but it is to release the build up of fluid in the ear and create a tiny passage so that the air can make the tiny bones in the ear function correctly.

So she told us that she went to hospital and they put something over her mouth. She didn't like the smell and it made her cry.  But now everything is really loud.  She is back to being her bossy, independent  little self and she is adorable.

Enough of that ... lets get on with the draw.  The name chosen from the list of comments today is YOU ...

Debra Kenworthy...
please email me your full postal address with postcode and country to
christina@card-making-magic.com
and the card will be on its way to you and I hope you will like it.

Please let me know when it arrives with you

More tomorrow ...

Hugs xx


September 04, 2015

Friday Freebie - 083

Hi Everybody,

This weeks card is a vision in white and features some of the dies from the Victorian Collection from Spellbinders.

This one is  Royal Circle  and I have backed it onto some silver mirror card for effect.

I have just cut one of the circles and then cut it in half to form the semi circles on the card.

Stagger them as you add them and then across the centre I have added a white panel that is also backed with mirror card and around that I have tied some wide satin ribbon from Mei Flower

The centre to the bow is one from my "Stash"  Use any embossing folder that you have to create some texture on the base panel and then layer it onto silver card before adding it to the base card

Layer the sentiment in the same way to complete your look.

So would you like to win this one ?? Then all you need to do is join the group of followers and leave me a comment at the bottom of the page.  It is from those comments that a name will be selected as the winner

The name will be in tomorrows blog post so please make sure that you come back and check if the winner is you.  You will have 48 hours to claim the card by sending me your postal address.

More tomorrow ...

Hugs xx

September 03, 2015

Special Wishes

Hi Everybody,

This card is a little more subdued than yesterdays but uses the same dies for the sentiment and the same pink spotty card from  AnnaMarie Designs

This card is 5x7 created with  Matting Basics  and I have used both the A and B sets to give me the layers that I need.

The next layer is parchment and I have embossed it with the Tied Together folder

Now this folder sells out every time it comes back onto the market so you may need to search for it.

I have trimmed the top and bottom of the parchment with  Scalloped Borders One

I have added it to my card with foam pads that sit under the sentiment and the ribbon and lace so that they cannot be seen

Into the cross sections I have added tiny pink pearls from  Want2Scrap

The sentiment has been stamped and embossed and then layered on tot the card front with foam to raise it up and I have used Standard Circle Lg  and matted it onto Lacey Circles

Have you joined in the new "Give Away"  yet .. you have until next Monday to add your name so what are you waiting for ??

More tomorrow ...

Hugs xx

September 02, 2015

Two of a Kind


Hi Everybody,

The Tuesday Tutorial from last week with the Scalloped Pop Up Box has been very well accepted and I have had several requests to make this box in a video tutorial.

Well what can I say except "Yes" ... I am always happy to oblige and so it will be done. 

I have some tutorials already in the pipeline but give me a little time and I will be with you soon.

Here is another variation and this was done with a darker card and different types of flowers. But it is just as pretty.  I like the fullness of both of these but as I said to you in the original post they are to full to fit into an ordinary envelope.

They are very pretty and well worth the effort of cutting the card and flowers to get such a lovely result. Watch this space the video will be with you soon

Don't forget that there is a new "Give Away" running and so if you have not yet entered your name to win the prize then click this link to go to the page ...  "Bank Holiday Give Away"

Please also join me today as I am showing you some Spellbinders dies on the Pick of the Day.  The shows are split between Ideal World and Create and Craft starting off at 8 am on Ideal World.

Send in an email to the shows and you may win one of the cards that I make.  
Also I have added a new video to the Inspiration page and if you click the photo in the top left of the screen it will take you to the page.

More tomorrow ...

Hugs xx

September 01, 2015

Tuesday Tutorial - Grateful Lattice

Hi Everybody,

Todays tutorial is another of those that will give you two cards for the price of one .. and no waste at all.  I have created two cards one gold and the other silver and just by varying the colors and the way you add in flowers, ribbons and pearls will create a new look for you each time.
Spellbinders Supplies:
Other Supplies:
Instructions:

With die #7 from Matting basics A create two card bases (Please remember that #1 is always the smallest die)
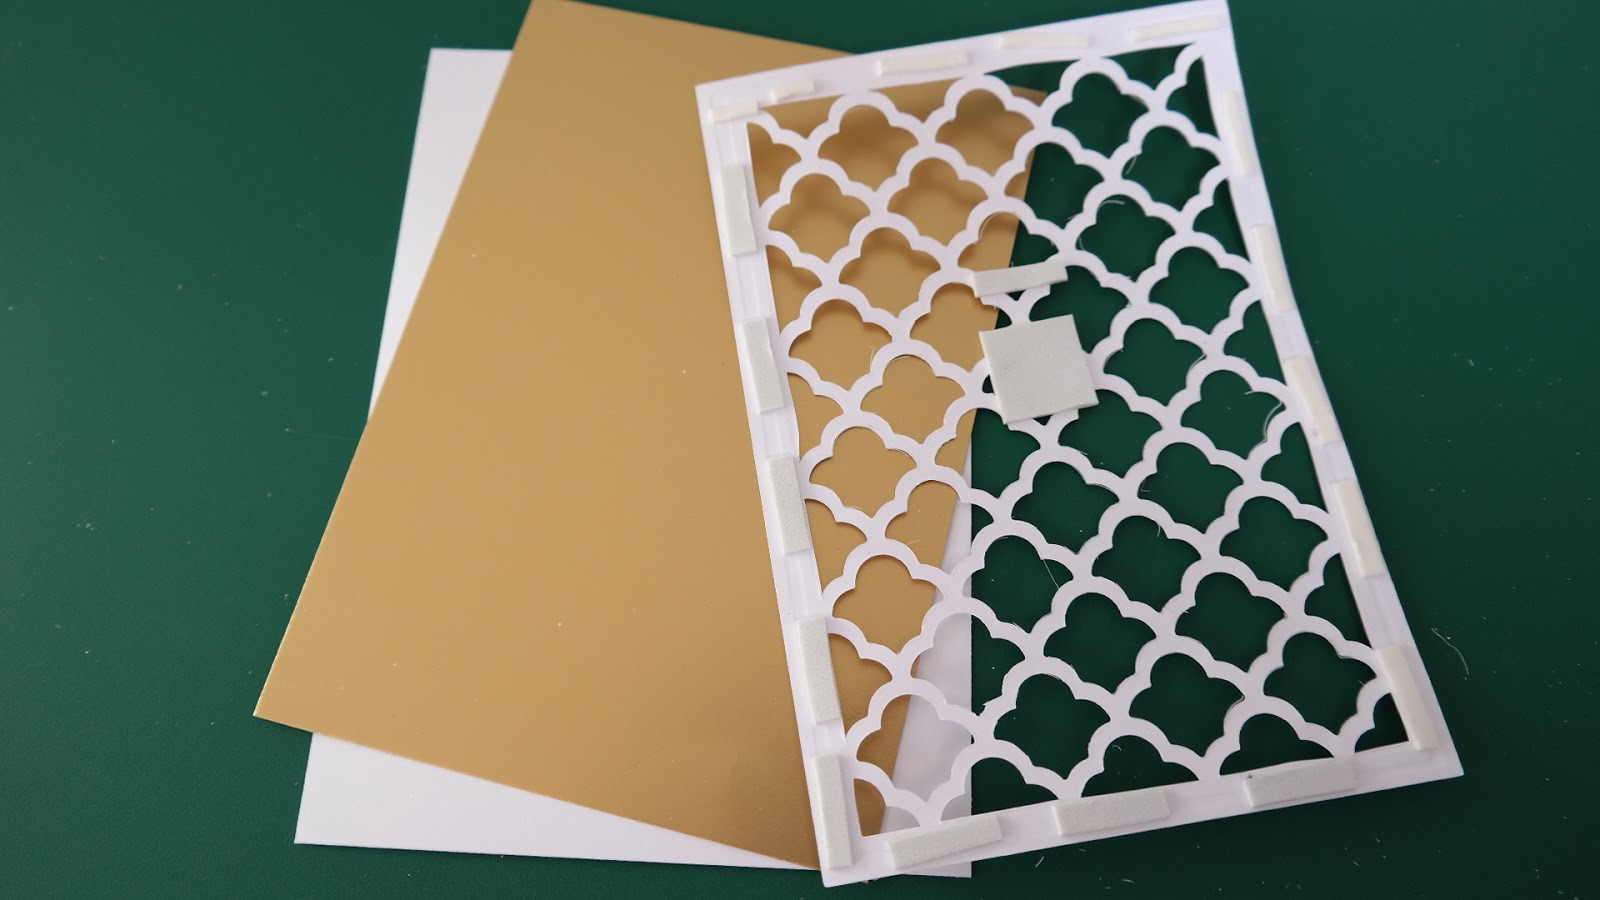
With die #7 from Matting Basics B and the Grateful Lattice die cut out one panel.
Carefully remove the Lattice work from the die leaving all the waste pieces in place. 

Trim away the side bits of the Lattice panel to tidy the edges.
Cover the waste pieces with double sided adhesive sheet and sprinkle with glitter of your choice

I used a fine silver glitter for mine and pressed it on to the adhesive sheet making sure that it is all covered.
Continuing with the silver panel I have got my base as a Hinged card  and to this I have cut a smaller silver panel and another in white and embossed this one.

Layer them all together using foam tape under the  Lattice panel. 

Wrap these with silver ribbon before adding to your base card
Add the full Lattice piece to some gold card using foam tape around the edges of the die cut and another in the centre to support the sentiment

Again I have added in some gold ribbon around the layers before adding them to the base card

With the Elegant Oval I have cut one gold and one silver oval from die #3 


Then I stamped and embossed my sentiments onto white card and cut them with die # 2

I have varied the orientation of these ovals to add another difference to my cards.

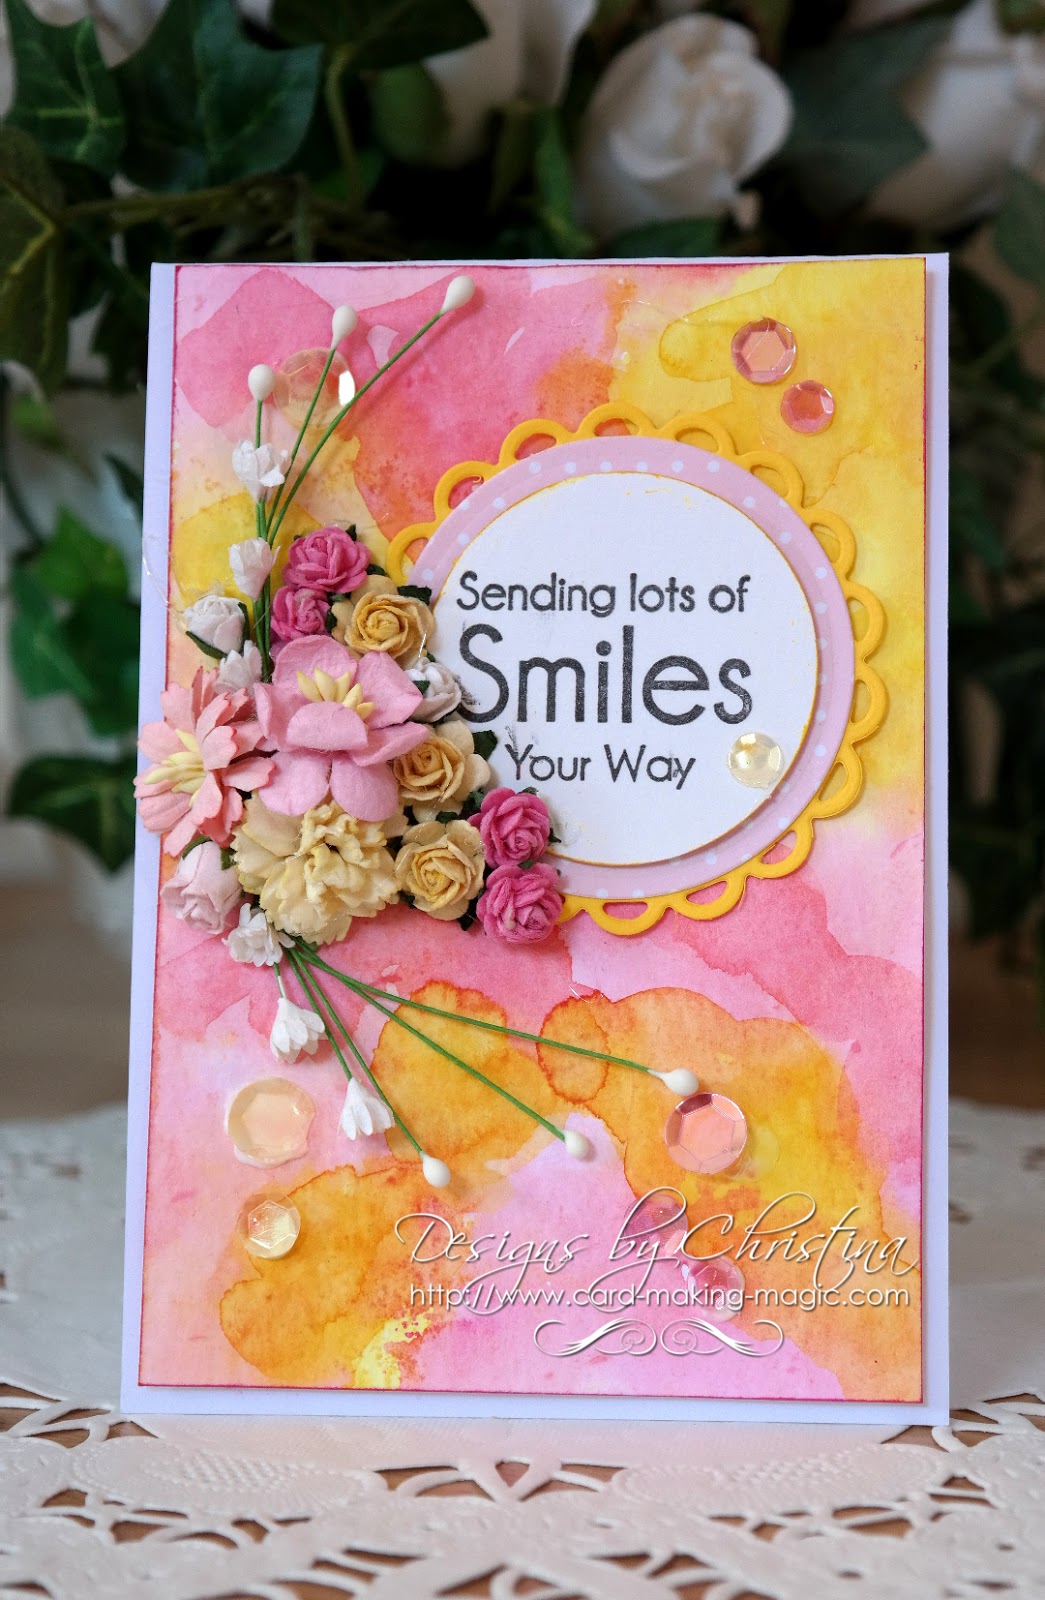
I added in my flowers on the gold card to frame the sentiment along the top right corner

I used a selection of Roses in gold and ivory, with  Tuscany rosebuds and gypsophilia  and all have been sparkled with fine clear glitter 
On the silver one I have added them to the bottom of the oval and used camellia, tulips, small rosebuds and gypsophilia 

And there you have two lovely cards ready to send and no waste at all from your precious cardstock.  

The same ingredients have been used for both cards but they look completely different 

Look at other dies in your collection and see if you can repeat this tutorial with them.

More tomorrow ...

Hugs xx